Human Powered Lights

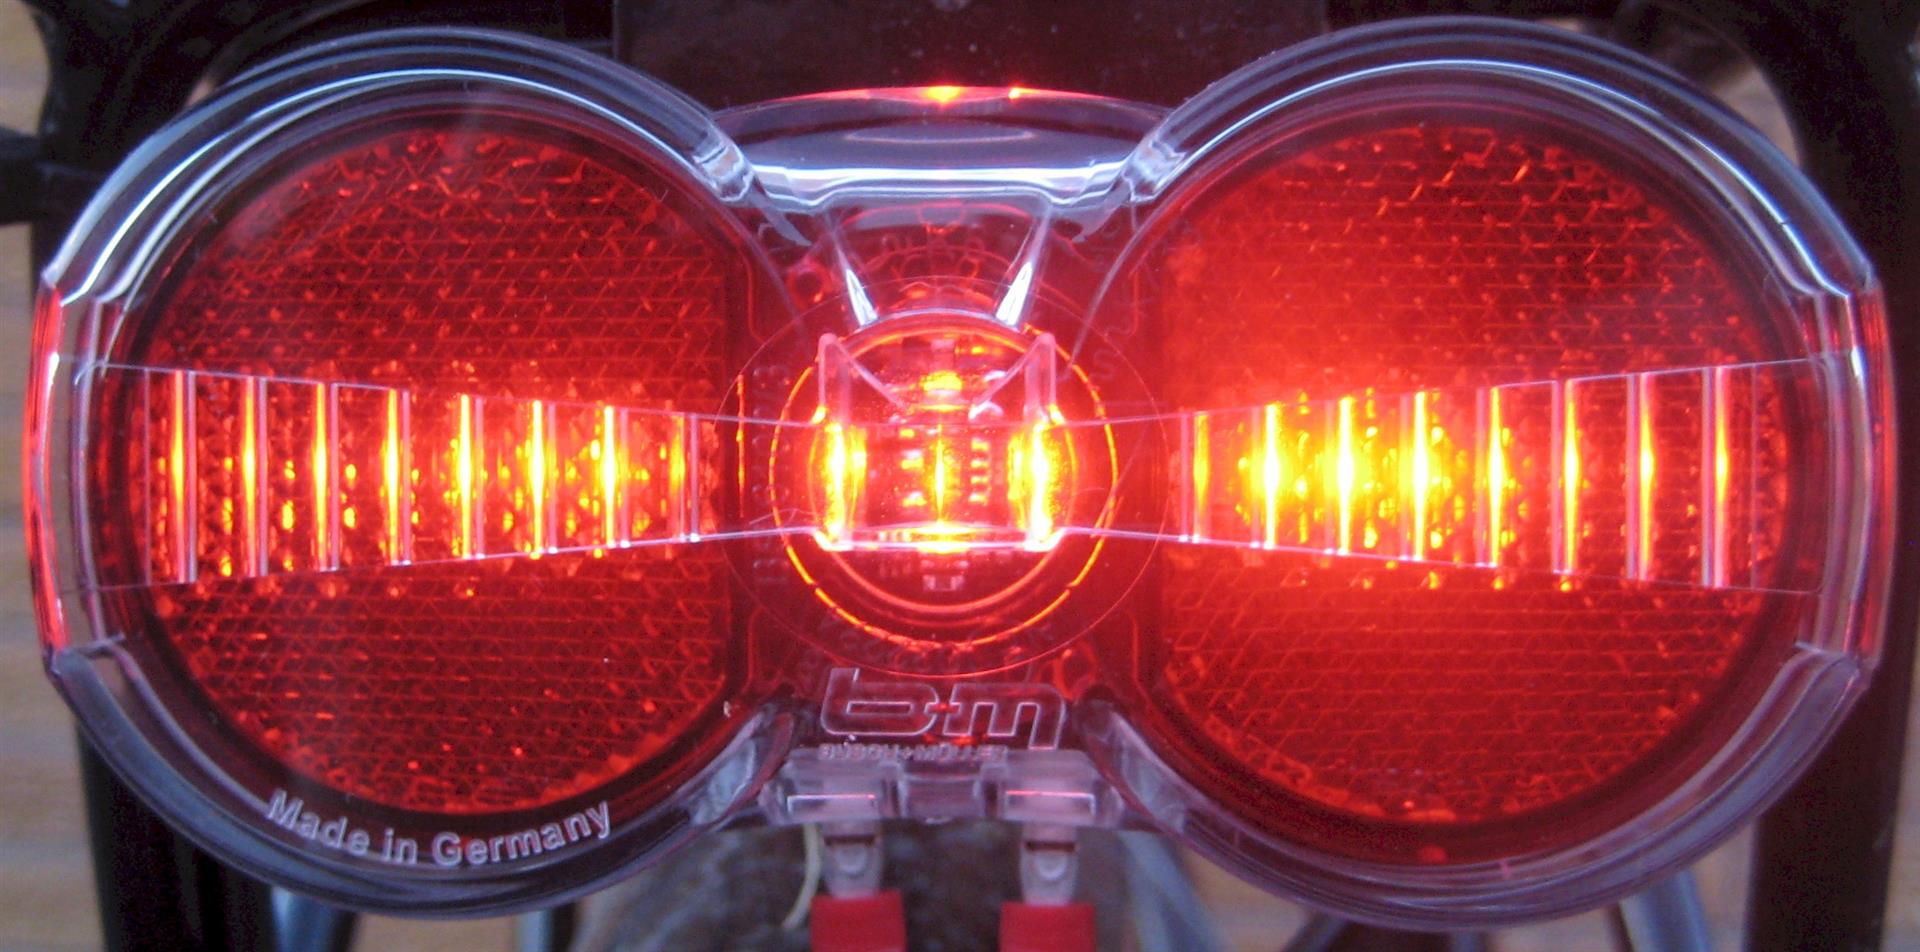
Busch & Müller Toplight Flat S Plus

It's that time of year when cyclists start to think about coping with less daylight. You have a human-powered vehicle, so why not add some human-powered lighting and never have to faff about with bike light batteries again? You can do this with a dynamo lighting system. I first switched to dynamo lights a few years ago, and I've never looked back.

For many people, the term "dynamo lighting" conjures up an image of struggling down the road to the accompaniment of a shrill whining wondering how it is such a dim, flickering light demands so much effort from your leg muscles.

The concept of a light that goes out when you stop in the middle of a busy junction doesn't inspire much confidence either, and every cyclist has heard of someone who shot down a steep hill one night and burned out their dynamo lights.

In fact all these difficulties only occur if you have outdated lights and a really awful, incorrectly fitted dynamo. The reality is that dynamo lighting has almost no effect on the effort required to pedal a bike, and the beam will be bright without blinding all oncoming traffic. On that subject, let's just take a slight detour.

Many cycle lights project light in a cone. If you point the light straight ahead, half the light is wasted lighting up the night sky, and blinds any oncoming road user for a considerable distance. Tilting the light downwards doesn't help greatly, because that just illuminates a small area very brightly, so your eyes adjust to that and anything outside that area appears to be very poorly illuminated. All but the least powerful dynamo headlights shape the beam so that all the light is directed as evenly as possible on to the road ahead; very little is wasted lighting up the night sky and blinding others. Such a beam is very effective for seeing by.

However, this wasn't the feature that got me investigating dynamo lighting. I was fed up with range anxiety caused by batteries. I was fed up with trying to ensure I had a set of batteries ready for action. I was fed up with lights that wouldn't stay on because the battery contacts were corroded. I was fed up with mounting systems that broke or didn't work very well (many of my bike lamps have fallen off and been smashed to bits, sometimes by the car behind). I was fed up with having to remove them both to prevent theft and avoid the need to lug around heavy batteries. The net result was that I usually didn't have a working set of lights with me when I needed them, and of course when I did have them they were pretty hopeless for seeing where I was going on Birmingham's unlit cycle routes. The consequence of that was that I hated riding my bike at night, and largely avoided doing so.

It was whilst poking around David Hembrow's Dutch Bike Bits website that I discovered there was a better way. I learned that that dynamo lights were not dim and hard work, and neither did they go out every time one stopped. One can spend quite a lot on bicycle lighting, and I didn't want to spend a whole load of money on something I wasn't sure about in order to do something I disliked doing. So I hedged my bets a little, and bought from David a modestly priced but quite well specified Union headlight, a cheap Basta rear light, and the cheaper of the dynamos David supplies. I fitted the system, and rapidly became a convert to dynamo lighting. Suddenly I could see where I was going at night, and I felt much safer (oncoming motorists would respect my right of way). It was not long before I was routinely cycling in the dark. In addition, if the daylight becomes rather gloomy, I have no qualms about switching on my lights. So the following year when I met David in person, I bought from him the better of the two dynamos he sells, and then I reworked the wiring on my bike to make it neat and tidy. However, my original dynamo has recently been put to work on another bike, so I thought it was time to pass on what I have learned.

Regulations and Staying Legal
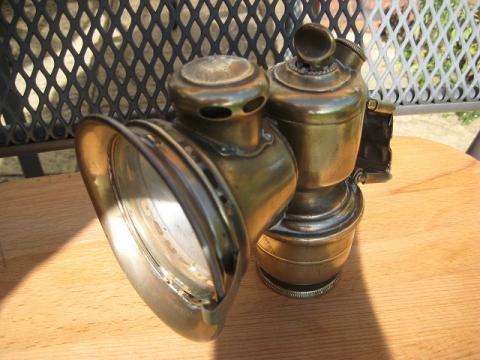
Lucas Aceta cycle headlamp
Joseph Lucas was a keen cyclist, and the well-known company he founded made this carbide cycle headlamp in Birmingham. Britain was a world leader in the manufacture of bicycles and cycling accessories for many decades, but these days we leave that to other countries.

The British cycle lighting regulations are a complete mess, but thankfully our membership of the European Union means that we can legally use lighting that conforms to the superior StVZO German regulations. These have in fact become the de facto European standard (we're not the only European country that has poorly defined bicycle lighting regulations). So whatever you buy, make sure it conforms to the German standard. In case you're wondering, StVZO stands for Straßenverkehrs-Zulassungs-Ordnung. That mouthful alone should make you wish the UK had maintained its lead in the cycling industries. It translates as the considerably less exotic Road Traffic Licensing Regulations.

Note that StVZO does not permit a flashing light, but be aware that it is very difficult to judge distance from a flashing light, so you are far better off with an StVZO compliant light. If a motorist doesn't see you whilst you are riding with the sort of lights described in this blog post, it's because they weren't looking. A flashing bike light wont protect you from someone who is absorbed in talking to their passenger or adjusting the overly complex controls on their in-car entertainment system. A bright blue flashing light that illuminates their car interior might get their attention, but that's not legal for most of us.

Technology

Bicycle dynamos are not dynamos at all. Technically a dynamo is an electrical generator that uses a commutator to produce a direct current (DC). A bicycle dynamo is in fact a magneto, a type of alternator that uses permanent magnets on the rotor. At any given speed it produces a constant alternating current (AC), which it drives into whatever it is connected to (known as the load). If the load isn't very large, the voltage from a dynamo can reach alarming proportions, large enough to burn out traditional incandescent bulbs. Modern electronics renders that a thing of the past by diverting the current into something that can dissipate the excess energy. However, the output is still AC, and the voltage will vary with both speed and load, so don't be tempted to connect your phone, say, to a bicycle dynamo in the hope that it will recharge the battery. If you want to do that, look for something designed for that purpose, such as this Axa headlamp.

Traditionally the most common type of bicycle dynamo is the bottle dynamo. This is driven from the wheel rim or tyre and offers about 70% efficiency. They work very well if of reasonable quality and when fitted correctly. They are very handy for use with an existing wheel, and on a sportier bike they have the advantage that they are not too heavy and can be disengaged completely. Finally, one can replace the wheel independently of the dynamo. However, Britain having created conditions that caused its once great cycle industry to all but die, dynamo lighting technology is driven by how bikes are used on the continent and in Japan. There most bikes are used for transport. Until recently, the StVZO regulations required that all bikes above 10kg sold in Germany had to be provided with dynamo lighting, which of course drove the market forward strongly. On a transport bike the additional weight of a hub dynamo compared with a bottle dynamo is not an issue, and neither is the residual drag when the lights are off, so in that market the otherwise superior hub dynamo reigns supreme. Continental bikes are increasingly fitted with hub dynamos in the factory. And now in this country both the Brompton Hire bikes and the Big Birmingham Bikes have hub dynamos. The reason is simply that they work better and they are a neat, elegant solution. However, since this blog post is about my retrofitting dynamo lighting systems to bikes with working wheels, it does not cover hub dynamos. Neither does it describe any of the other, more niche technologies.

The better dynamo lights all have a stand light (or in German and Dutch, Standlicht) feature. This keeps the light illuminated for a few minutes after you stop. Headlights typically dim the light to prolong the stand light time. This has been made practical by LED lighting and an electronic component known as a supercapacitor, though in the past the same was achieved on luxury bikes with a couple of chunky NiCd batteries mounted in a carrier on the frame and charged from the dynamo. My mother had such a system on her British-made Rudge, which also had a hub dynamo. Had we not stuck doggedly with the motor city concept, perhaps this blog post would feature rather less German and Dutch. Then again, it probably wouldn't even exist, as we would all be riding around on bikes with factory-fitted dynamo lighting and thinking nothing of it, just like the Germans and the Dutch.

Tags: 

Nordlicht Dynamo

Nordlicht dynamo
The Dutch typically mount the dynamo on the front wheel, because it makes wiring easier. However, I found the mount too resonant on this bike, so I transferred mine to the back wheel, where it also looks neater. I wanted to continue allowing the front light to switch the back light on and off (either with the switch, or automatically using the light sensor), so I had to be creative with the wiring. I used chunky stereo audio cable, which looks superficially like speaker cable, but each half of the figure-of-eight cable has a central core and an outer screen. So in effect each half has two wires. The complete cable runs from the front light (one half carrying power from the dynamo, the other half carrying switched power from the light), along the underside of the down tube and the left-hand chain stay to the rear axle, where it splits into two. One half goes up the seat stay to the dynamo, whilst the other half goes to the back light via a rack stay. The screened cable is fiddly to work with, and demands a soldering iron, but the result is very neat. The Nordlicht dynamo (Nordlicht is Dutch for "north light") tilts in towards the wheel when the button is pressed, so it can run in either direction. However, it is still handed because the the mounting bracket is to the right of the dynamo body, so it cannot be mounted on the right-hand side of the bike because it would then interfere with the brakes. If your bike has braze-ons for a dynamo, make sure you get the correctly handed dynamo. Also, I recommend the use of a rubber drive wheel, either as supplied with the dynamo, or by adding a rubber "hat" as I have done. This eliminates the traditional bottle dynamo curse of slipping, and gives you the possibility of running the dynamo on the wheel rim (which may prove quieter than running it on the tyre). This dynamo runs on the rim. Cable sourced from Maplin (www.maplin.co.uk), dynamo, bracket, and rubber hat sourced from Dutch Bike Bits (www.dutchbikebits.com).

Tags: 

Axa HR Traction Dynamo

Axa HR Traction dynamo
The Axa HR Traction dynamo is more hi-tec than the Nordlicht, but it it is not as robust. Its benefits are that it has a lighter body, a voltage limiter (dynamos had a reputation for burning out tungsten filament bulbs), and a very neat connector block that allows the connection of up to four stripped wires (two for the front light, and two for direct connection to the back light). It is also cheaper than the Nordlicht. It has a rubber wheel, but I found the dynamo body fouled the spokes, so unlike the Nordlicht above I run this dynamo on the tyre wall (upon which note the dynamo track). The geometry of this bike meant that it didn't fit well on the rear wheel, so it is mounted in the traditional Dutch style, with the wire taken up the front fork to the headlamp, secured in place using zip ties. Note the use of a small piece of butyl rubber (pond liner off-cut) to provide mechanical isolation between the dynamo and the fork. This reduces vibration through the frame, and stops the paint being scratched. This bike has oversized forks, which meant I had to substitute some longer bolts from my junk box. These were slightly thinner than the originals, so I added some washers to compensate. The Axa dynamo is of the "swinging door" variety; it moves like a door until it makes contact with the wheel. It's imperative this type of dynamo is mounted the correct way around, with the forward motion of the wheel trying to open the door. Do it the other way around, and you risk the dynamo wedging itself between the frame and the wheel, which on a front wheel is potentially lethal. Dynamo and bracket sourced from Dutch Bike Bits (www.dutchbikebits.com).

Tags: 

Axa Cable Management

Axa cable management
The Axa dynamo has a neat clip for attaching the cable to the dynamo. Note that there are two wires. Poor quality dynamos have just one, and use the frame for the other connection, a technique that invariably causes all sorts of problems. Don't even think about buying such a dynamo.

Tags: 

Setting the Correct Angle

Setting the correct angle
It is important that the spindle of the dynamo is aligned with the wheel axle, otherwise energy will be lost driving the dynamo (imagine what would happen in the extreme case of having the dynamo rotated ninety degrees; the dynamo wouldn't turn, but rather it would act as a brake). This does require a lot of fiddling around with the bracket (which as you can see, has three bolts), but it is worth the effort. A piece of string stretched taught works well for this task.

Tags: 

Büchel Secu Sport S

Büchel Secu Sport S
This is a Büchel Secu Sport S headlamp I initially found on amazon.de. It can also be found on amazon.co.uk, but be careful. The similarly named Secu Sport, sold by Sports Direct, is only 25 lux. This version is 40 lux, which allows you to ride with confidence in unlit areas. It has a reflector and is StVZO compliant. It also has a stand light. It's supposed to be mounted on the crown bolt, but this proved awkward as the cantilever brakes on this bike interfered with it. After some faffing around, I decided to simply remove the reflector from the reflector mount I had just removed, and refit it it to act as an extension. Note the small spade connectors poking forwards under the lamp. These get connected to the rear light, and allow the rear light to be switched using the switch on the headlamp. Sourced from amazon.co.uk.

Tags: 

Secu Sport Headlamp Wiring

Secu Sport headlamp wiring
I inserted a grommet into an existing hole on the old reflector bracket to support the wire on its way down to the dynamo. The cable to the rear lamp is connected to the front lamp using spade connectors. I've added some heat-shrink sleeving to protect them. This is oversize, but when heated using the low setting of a hot air gun, it magically shrinks to fit. It's also useful for dressing Bowden cable ends so they don't fray. Note that I have hung the cable over the lamp mount to provide strain relief. The heat-shrink sleeving and spade connectors (order code N22AN) are from Maplin (who have several stores in Birmingham). The grommet came from my locker door when I was in the fifth form at school; I just knew I had a better use for them, and forty years later I was proved correct. I expect Maplin sell them.

Tags: 

Crimping a Spade Connector

Crimping a spade connector
Dynamo lights often use spade connectors, and spade connectors are crimped on using a crimp tool. This provides the exact right amount of pressure to effect a secure gas-tight joint between the stripped wire end and the connector, and without using a soldering iron. Note that the colour of the insulator matches the colour of the dot on the tool. Crimp tools used to be expensive, but these days Maplin sell them at a far more reasonable price.

Tags: 

Rear Light Mounting

Rear light mounting
Dynamo-powered rear lights are typically designed to fit either the end of the mudguard or the end of the rack, which should have a mount for such lights. Even old racks should have a lamp mount, though at some stage the hole spacing was standardised. Rack mounting is by far and away the best way of mounting a rear light, but if you have neither rack nor mudguards, you'll need to fettle your own mounting bracket. Take no notice of the + and - signs on the back of this lamp. All bicycle dynamo systems are intrinsically AC, so positive and negative has no meaning. These connectors could be swapped around and the light would still work.

Tags: 

Rear Light Wiring

Rear light wiring
The cable between the front light and the back light is two-core oval mains flex. Traditionally bell wire is used, but mains flex is tougher. The cable is looped around the head stock with just sufficient slack to allow the handlebars to be turned, and then along the underside of the down tube and left-hand chain stay. From there it goes up a rack stay to the rear light. Much use is made of zip ties to keep it there. Do it right and it wont really be noticeable. Note that the rear light also uses spade connectors. Mains flex sourced from B&B Electrical Wholesalers on Ribblesdale Road. Maplin also sell it when they actually have it in stock (don't believe what their computer says), but they charge more. Three metres will be sufficient for a standard bike.

Tags: 

Busch & Müller Toplight Flat S Plus

Busch & Müller Toplight Flat S Plus
An excellent rear light. The light-spreading optics of the Busch & Müller Toplight Flat S Plus create a line of light that makes it easier to judge distance. It has a stand light to keep it illuminated when you stop. Sourced from amazon.co.uk.

Tags: 

Union Headlamp

Union headlamp
This Union headlamp offers 35 lux with a shaped beam. That makes it good enough for full speed cycling on unlit paths, but it has insufficient beam width for comfortable long distance cycling on unlit roads. A stand light feature keeps it illuminated when the bike is stationary. It has an integral front reflector, so all in all it complies with the German StVZO lighting regulations (making it road-legal in the UK). It can be set to switch on automatically when the ambient light level is too low, which is particularly useful if you have a hub dynamo. The rear light is connected to the front light via the two red spade connectors. Lights such as this are intended to be mounted on the front fork crown bolt, but since that is used on my bike to mount the centre-pull brake calliper, I mounted the headlamp on the handlebars with the aid of an old C clip from my junk box (originally used to mount an obsolete electronic capacitor on a metal chassis). Light sourced from Dutch Bike Bits (www.dutchbikebits.com).

Tags: 

Basta Ray Steady

Basta Ray Steady
The good-looking Basta Ray Steady has the advantage of a large reflector area for reflecting back the light from motor vehicle headlamps. It is also has a stand light, and is remarkably cheap. However, as supplied the LED light is not very well diffused, so I inserted a small piece of clear plastic which I fogged with fine abrasive paper. That said, it does emit more light upwards than other designs, which will make you more visible to drivers in a high cab. It also emits a lot of light sideways, which is helpful when you're crossing the path of other traffic. Sourced from Dutch Bike Bits (www.dutchbikebits.com).

Tags: 

Headlamp Angle

Headlamp angle
Note how a loop has been formed in the rear light cable at the bottom of the headstock with just sufficient slack to allow the handlebars to turn. It's zip-tied to the rear mech Bowden cable outer to keep it it place. Before your first ride in the dark, set the headlamp so it is pointing straight ahead. Then once it is dark go for a ride somewhere unlit and adjust it (downwards, typically) so it lights just enough of the way ahead for comfortable riding. Setting it high will blind the operators of oncoming vehicles, and make the illumination rather feeble (don't forget that the optics are designed to spread the light evenly). One advantage of the arrangement I have used on the Union headlamp is that I can tilt the light as required without tools.

Tags: 

Asssistant Mechanic

Asssistant mechanic
Choose your assistant carefully if you want to make any progress whilst you work on your bike.